Adding lights to any project is fun, but programming custom images can be time consuming. I mostly buy individually addressable LEDs or “NeoPixels” in strips and then cut and solder them to suit my need. When I need a square block of lights, like for my LOL-RA Lamp, a matrix comes in handy. A 16×16 matrix gives you 256 LEDs, with each having the ability to display its own color. The only downside is the zig-zag pattern the LED pixels follow makes it a small challenge to convert an existing image into the proper code. There are a few ways to generate the code necessary to go from image to code for your Arduino and I’ll lay out two.
The Problem: This is a typical LED matrix. Some may start from left to right, but they all zig-zag the chain of lights. When I think of images, I think in terms of top left, across to right, down, and then left to right again. I know computer images generate differently but it is easier for me to think the top left is position 0.
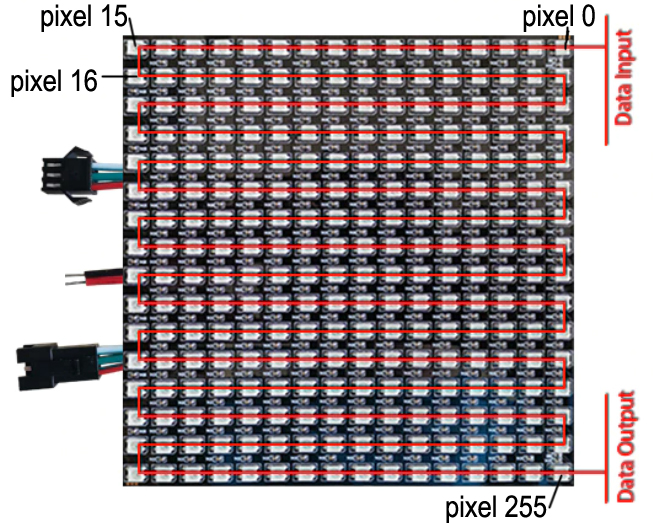
Using Excel to Draw an Image
I’ve found using Excel to plan out an image is pretty easy. I start with 16 rows and 16 columns, adjust the height and width to the same size so each cell looks square. Next I populate numbers in each cell, starting with 0 in the top right going to 15 to the top left. If you type in 0 and 1 and highlight both, you can drag across and Excel will autopopulate for you. Next, go down one row and do the same starting with 15 until you have this.

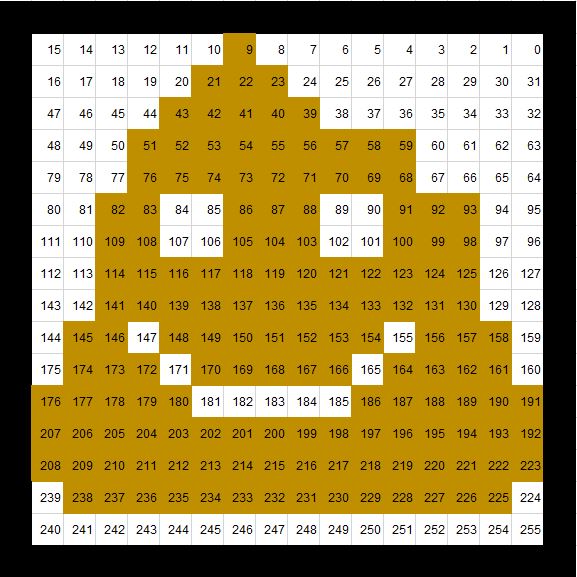
Next, I use the highlight button to “color” each cell to get the image I want. There is a lot of trial and error to get it right but undo is easy enough. This example just uses one color, but each NeoPixel can support 16 million different RGB colors (256 *256*256) so get creative.
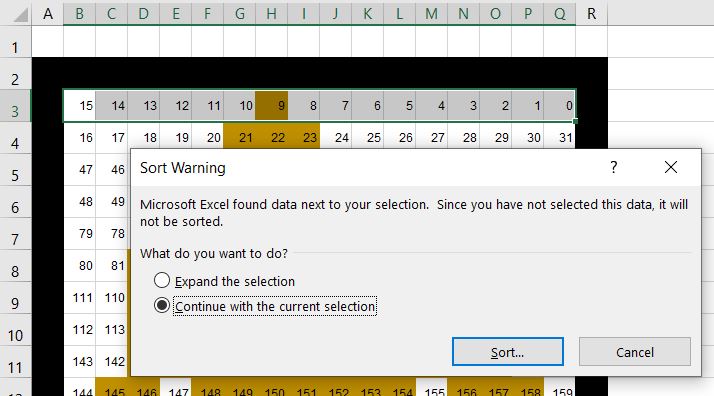
Now that you have your image, you need to reverse the order of the “pixels” for every other row starting with the first. You can do this with Excel’s Custom Sort. Highlight the row, select Custom Sort, check “Continue with the current selection”, and click “Sort”
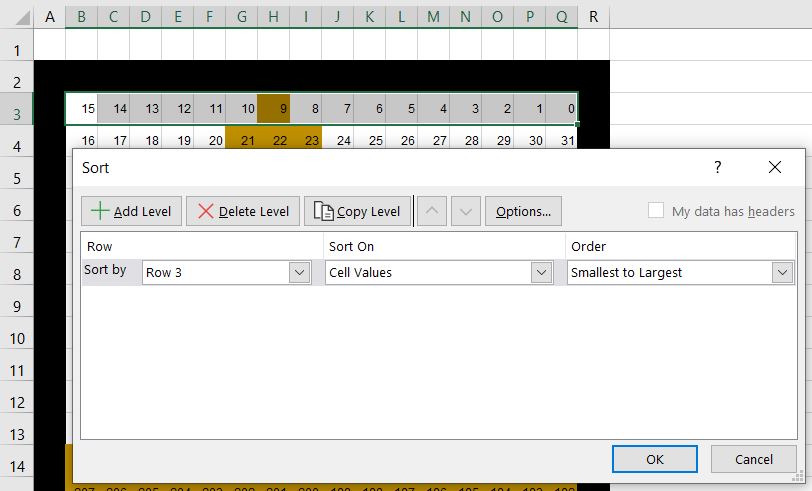
In the next dialogue box, select “Smallest to Largest” as the Order and click “OK”. Not only will the order of the numbers in the cells reverse, but the highlights will follow.
Keep reversing every other row until you get to the end.
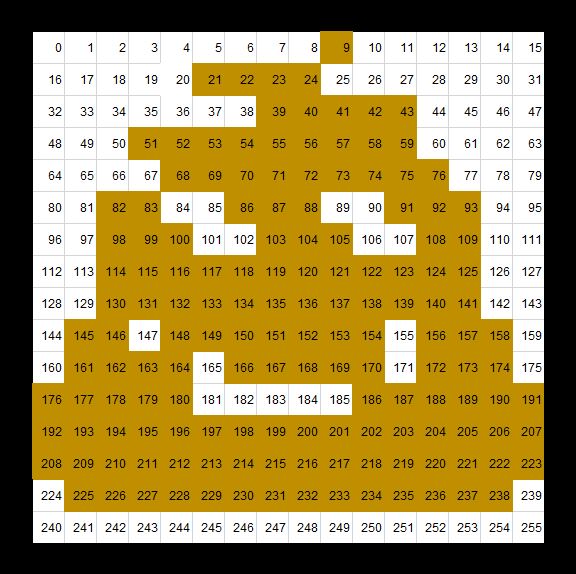
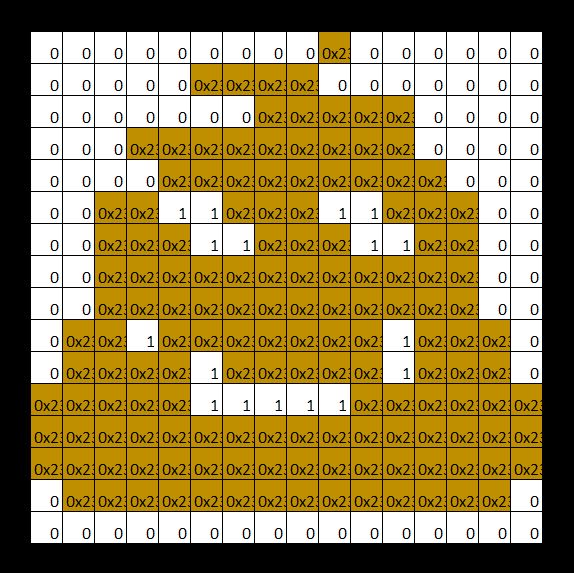
Since NeoPixel library can use the hex value to assign the LED color, I used Google’s Color Picker to find the color I want. Paste the value into each highlighted cell. Any cell that is blank (no lights on), paste a 0.
In this example, you’ll notice I pasted a 1 inside a few cells. I used that a variable in my LOL-RA Lamp code so I can change the color on the fly, but I won’t go into that here.
Save the Excel as a CSV and then use something like Notepad to open the CSV as a text file. This way, you loose all of the extra information Excel adds on and just get the raw values like below. You will need to add an extra comma at the end of each line (except the last line).
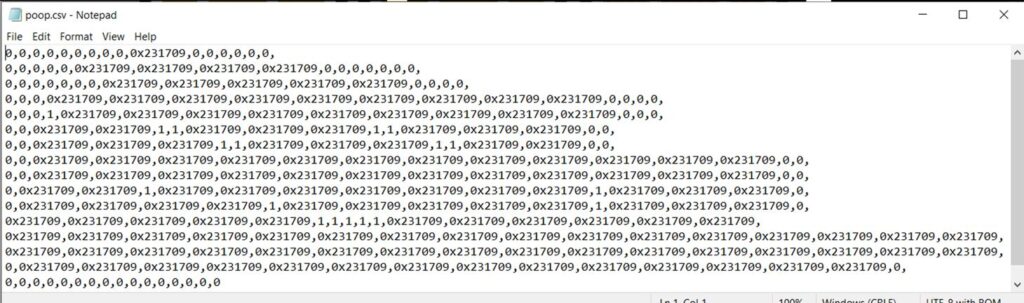
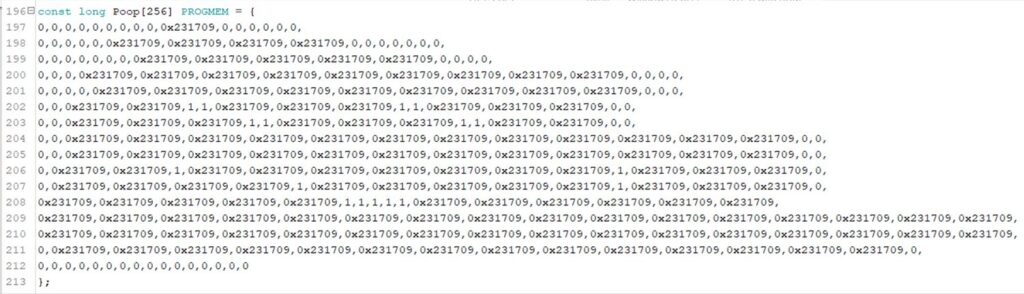
This is code that you can now copy into your Arduino program as an array. Notice how I use the PROGREM command for the array. Since there are so many values, the PROGREM command enters the whole array into Flash memory to be used by the program.
Here is a snippet of code to create a function that will render the image on your matrix. This uses the FastLED library so you’ll need to declare that as well. You can look at my LOL-RA Lamp file to get a complete picture.
void PoopDisplay()
{
FastLED.clear();
for(int i = 0; i < NUM_LEDS; i++) {
leds[i] = (pgm_read_dword(&(Poop[i]))); // Read array from Flash
}
FastLED.show();
}